They are making a few good observations relating to How to Fix a Leaking Tap Without Getting Professional Help overall in the content beneath.
Intro
A leaky faucet is not just aggravating but can additionally throw away a substantial amount of water and lead to raised energy costs. In this step-by-step overview, we'll walk you via the procedure of dealing with a leaky tap, enabling you to conserve water and cash while maintaining your plumbing system.
Checking for Damage
As soon as you have actually subjected the shutoff assembly, examine it for any type of signs of damages or wear. Usual offenders of a dripping tap consist of damaged washing machines, O-rings, or seals.
Replacing Faulty Parts
If you recognize any type of damaged or worn-out parts, very carefully eliminate them making use of a wrench or pliers and change them with new ones. Make certain to make use of the proper size and kind of substitute parts for your faucet.
Reassembling the Tap
After replacing the faulty components, meticulously reassemble the tap in the reverse order of disassembly. Ensure that all parts are properly straightened and tightened to prevent future leakages.
Gathering Tools and Materials
Prior to you begin, collect the needed tools and materials for the repair. You'll usually require an adjustable wrench, screwdrivers, replacement washers or seals, plumber's tape, and a cloth or towel to tidy up any spills.
Shutting Down Water System
Situate the shut-off shutoff for the affected tap and turn it clockwise to shut down the water supply. If you're unable to find the shut-off valve, you may require to shut off the main water system to your home.
Dismantling the Tap
Utilize a screwdriver to remove the deal with of the tap, subjecting the interior elements. Depending on the sort of tap, you might require to loosen a cap or collar to access the valve setting up.
Guaranteeing Correct Capability
After validating that the tap is leak-free, test its capability by transforming it on and off several times. Ensure that the tap operates smoothly and without any unusual sounds or resistance.
Cleaning Up
Finally, tidy up any type of debris or spills from the repair work procedure and dispose of any kind of old or damaged components effectively. Leaving the work area spick-and-span ensures an expert coating to your repair service.
Evaluating for Leakages
Once the tap is reconstructed, transform the water back on and check the faucet for leaks. If you notice any type of leakages, ascertain the connections and tighten them as needed.
Final thought
Taking care of a leaky faucet is a reasonably simple DIY job that can conserve you money on water expenses and prevent more damages to your plumbing system. By following this step-by-step overview, you can tackle the fixing with self-confidence and delight in the benefits of a leak-free tap.
How To Fix a Leaking Tap?
There are few things more annoying than an incessantly dripping tap. But, aside from the annoying side of it, a leaking tap also means that something isn’t working as it should - and should we even mention the waste of water?! It might be something easily fixed, like a loose O ring or a corroded washer, or there could be something more serious going on, like a tap leak that requires professional attention. If it's in the easier category, here’s a simple guide on how to fix a leaking tap.
What you’ll need to fix your tap leakage
There are a few items you’ll need that might not be in a typical toolbox. If you are new to DIY plumbing, you might need to purchase or borrow some essentials. You’ll also need some spare time to get this done - especially if it’s your first foray at being a plumber for a day.
A washer to fit your tap (the most common size is 12mm, but double-check the size of your current washer for tap washer replacement) O-ring Spanner or wrench (best if it is adjustable, crucial for changing a tap washer) Tap lubricant Screwdriver Jumper valve Preparation of leaking tap fix
This guide will work for all general taps, including how to stop a leaking laundry tap, and addressing bathroom and shower water tap leaks.
Firstly, shut off the water supply at the main. This is typically out the front of your home either on the street or in your yard, or inside the bathroom or laundry for apartments and townhouses. Turn on your tap to get rid of excess water sitting in the pipe.
Identify your issue… Is the washer corroding? The O-ring? Check pipes for any evidence of corrosion or rust. Is it your hot or cold water tap leaking?
If the water is leaking down the tap itself, the issue is your O-ring. If the tap is dripping from the spout while it’s off, this is the washer. You might want to just replace both to be on the safe side, and avoid having to repeat the process later.
Set your tools close to the area you’re working on for easy access, and have a cloth or rag close by to help keep your hands and the equipment from transferring grease and lubricant.
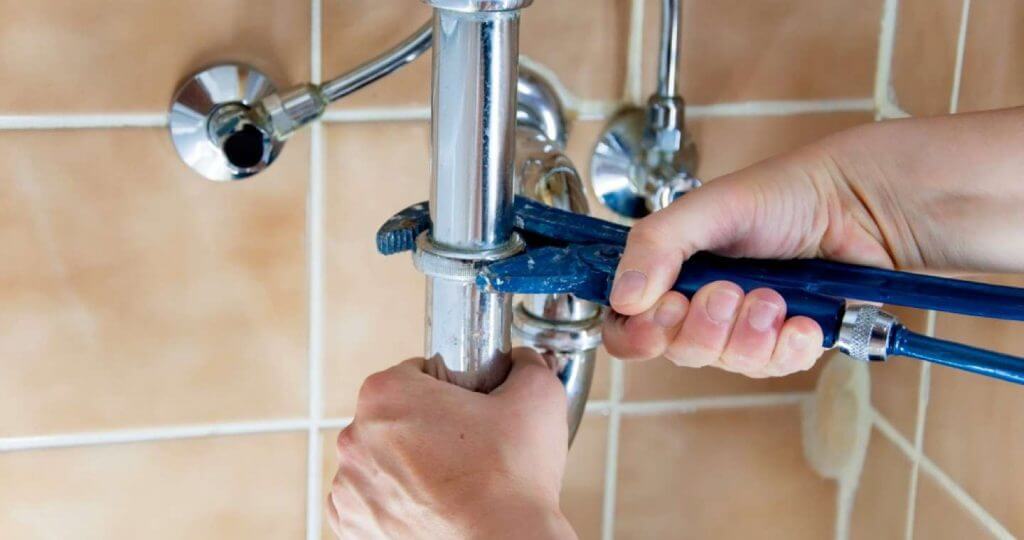
Getting started on stopping your leaking tap
Start by using your spanner to remove the tap cover and then the handle. Remove the headgear by unscrewing the bonnet to loosen. You should now see your washer, jumper valve, and O-ring. Start your leaking tap repair
There are few things more annoying than an incessantly dripping tap. But, aside from the annoying side of it, a leaking tap also means that something isn’t working as it should - and should we even mention the waste of water?! It might be something easily fixed, like a loose O ring or a corroded washer, or there could be something more serious going on, like a tap leak that requires professional attention. If it's in the easier category, here’s a simple guide on how to fix a leaking tap.
What you’ll need to fix your tap leakage
There are a few items you’ll need that might not be in a typical toolbox. If you are new to DIY plumbing, you might need to purchase or borrow some essentials. You’ll also need some spare time to get this done - especially if it’s your first foray at being a plumber for a day.
Start with:
A washer to fit your tap (the most common size is 12mm, but double-check the size of your current washer for tap washer replacement)
O-ring
Spanner or wrench (best if it is adjustable, crucial for changing a tap washer)
Tap lubricant
Screwdriver
Jumper valve
All of these items can be easily bought at a hardware store, but if this feels too complex, give Enviromate Plumbing a call to fix that leaking tap. We service the greater Newcastle, Hunter Valley, and Lake Macquarie regions.
Preparation of leaking tap fix
This guide will work for all general taps, including how to stop a leaking laundry tap, and addressing bathroom and shower water tap leaks.
Firstly, shut off the water supply at the main. This is typically out the front of your home either on the street or in your yard, or inside the bathroom or laundry for apartments and townhouses. Turn on your tap to get rid of excess water sitting in the pipe.
Identify your issue… Is the washer corroding? The O-ring? Check pipes for any evidence of corrosion or rust. Is it your hot or cold water tap leaking?
If the water is leaking down the tap itself, the issue is your O-ring. If the tap is dripping from the spout while it’s off, this is the washer. You might want to just replace both to be on the safe side, and avoid having to repeat the process later.
Set your tools close to the area you’re working on for easy access, and have a cloth or rag close by to help keep your hands and the equipment from transferring grease and lubricant.
Getting started on stopping your leaking tap
Start by using your spanner to remove the tap cover and then the handle. Remove the headgear by unscrewing the bonnet to loosen. You should now see your washer, jumper valve, and O-ring. Start your leaking tap repair
Step 1:
Once removed, take off the cover plate at the base of the stem. If it has been affixed by glue, reach for the pliers to help you get it off without damage.
Step 2:
Replace the washer and/or O-ring and jumper valve with your newly bought parts. Applying tap lubricant on the spindle and valve will help to seal the tap.
Step 3:
Be sure to pay close attention to where each part is and how it’s put together, so that you can replace it by just working backward from how you disassembled them
Step 4:
Be careful not to overtighten the nuts and bolts when refitting the bonnet and spindle; you want there to be a bit of movement here (firm fit, but not too tight).
Check that your dripping or leaking tap is fixed
Once your tap has been reassembled with new parts, it’s time to check your handiwork. Turn on your water supply and turn your tap on slowly.
If water comes through without any evidence of leaks, and turns off without dripping, you’re done! Well done.
If your tap continues to leak and drip, it’s time to call one of our plumbing experts and find out what the issue is.
https://www.enviromateplumbing.com.au/our-blog/how-to-fix-leaking-tap
We hope you enjoyed reading our part about How-To Guide On Fixing A Leaking Tap Or Faucet Step. Thanks for taking a few minutes to read through our piece. Appreciated our piece? Please quickly share it. Let someone else check it out. Thank you for taking the time to read it.
Schedule Service